Input amounts you want to send into Amazon FBA Warehouses on your Restock Sheet (for info how to set up see Quick Start) 
Make your selections of items you want to send into Amazon FBA. Add the expiration date of the product if needed. You can also go into the Inventory Status and add the tax code so it will input into Inventory Lab. (Note above is for illustration example only) Click on the check mark to finalize the sheet.

Click on Finalize in the pop up menu. After Finalization you will be able to adjust quantities but will not be able to add any new SKUs to the sheet. You will be automatically taken to the "Restock History" page as seen below. Your Finalized sheet will be placed in FBA Restock History que.
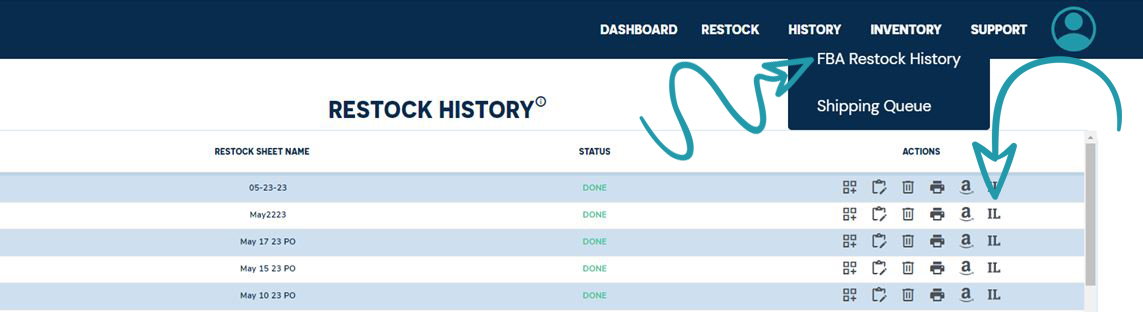
You will be taken to this page automatically but can access at anytime under History\FBA Restock History tab. Click on the Inventory Lab icon of the sheet you want to send to Inventory Lab. A download of the cvs file will appear on your computer.
Warning: Do not open in Excel - if you do, it may reformat your date. You may need to reformat your date purchased into a mm/dd/yyyy formation before saving again. Inventory Lab will have an error if the format of the date is not correct.
Tax Codes There are two ways to make sure your tax codes are brought into Inventory Lab. 1. Add the tax code to each item in the Inventory Status page. You can do this individually for each item. The tax code will then populate to the products in your CVS file that you downloaded to upload into Inventory Lab. 2. For bulk process your tax codes; from the Inventory Status page you can export a CVS file.The tax code column has a dropdown you can choose. You may also copy and paste to fill multiple cells.

After you are done you can import the file back into Active inventory for your Inventory Upload, you can bulk copy/paste the tax code to all the products. If you do not have the tax code field filled in on the CVS file that you import into Inventory Lab, the blank field will overwrite you existing tax codes in Inventory Lab and you will need to manually add the tax code to each product before completing the shipment. For any new products, go to settings and choose a default tax code that can be added to any products that you add.
Open Inventory Lab under the "List" tab select "List & Prep" by hovering over List on top menu.
Select "New Batch"
A pop up will appear. Click on "Select File" and choose the CVS you created in Active Inventory to import. Then select the options which match how you process your shipments through Inventory Lab. Go to bottom of pop up and click on "Process Buy List" to import the file into Inventory Lab
You will see a screen to match your columns to the excel file. Have the corresponding columns be set. Your file will already be set up to match.
You can click "Replenish" for each or hover over "Bulk Replenishment Options" and select "Replenish All" to do a bulk replenishment.
A pop up will appear to allow you to Replenish. On the bottom you can delete SKUs, Ignore matching SKUs or if you just hit "Replenish" on the right you use the existing SKU.
Next page will list all your information from the file. Click on the "Next Step: Amazon Validation" on the bottom right.
Next Step: Create Batch".
Click on "Review Batch" bottom Right
Click on "Submit" Bottom Right
Click "Sync"
Was this article helpful?
That’s Great!
Thank you for your feedback
Sorry! We couldn't be helpful
Thank you for your feedback
Feedback sent
We appreciate your effort and will try to fix the article